Showing posts with label style. Show all posts

Saturday, March 10, 2012

10, 9, 8 76ers!

Last night my boyfriend took me to see the 76ers play the Utah Jazz. It was not so much a date as it was an opportunity for me to witness a guys' night out. So out of place was I that one fan assumed I was the designated driver of the group.

I haven't been to a sixers game since I was 16. Allen Iverson was the star of the team then. Now people love Andre Iguodala. Say that name aloud - Andreiguodala. It just rolls off the tongue. 

Plus, look at this cute logo. It's nice and retro. It reminds me of converse hightops and those basketball socks that approach your kneecaps. I approve of the new (since 2009) jerseys. When it comes to logo design less is more:

Too much going on here: this logo is lame 1997-2009

Allen Iverson is happier in retro chic block letters.


Basketball is my favorite game to watch. I like sports where the ball is in play close to 100% of the time, and scoring happens every 20 seconds. AND I played third string point guard in junior high, so clearly the sport is dear to my heart. 

At these games you enter into another universe, where giant men hold giant balls upside down in the palm of one hand. Smaller men dunk baskets as they flip off trampolines. Toddlers, teens and grown women do slutty dancing for MY entertainment. Welcome to Comcast Country, as the sign above the court reads. 

Hearing the 76ers oldschool anthem was definitely a highlight in an evening full of highlights. I can't decide if I prefer the oldschool song or G. Love's nineties interpretation (ahhh halter tops and brown makeup - very Friends-esque).    


The 76ers beat the Jazz, 104-91.  I'm not even going to pretend to be able to interpret the game. For more information, I refer you to sportshouting.

Confession of total ignorance: I thought the Jazz were from LA or at least somewhere more Jazzy than Utah. I was grateful when a friend pointed out that the Jazz were originally a New Orleans team, which makes a lot more sense.  

I hope to get to another game this year. The Phillies have all the attention lately, but I think the Sixers are way cooler. 

-Melissa

Wednesday, March 7, 2012

Channeling Your Inner Prep: Classic American Mail-order

From L.L. Bean Signature

From Land's End Canvas

Marcie: Let's face it, most middle-class kids have had an L.L. Bean or Land's End catalog darken their door. 

Melissa: I definitely wore an all-cotton, forest green turtleneck religiously as a tween.
 

L.L. Bean Deluxe Book Pack
Marcie: Sure, who hasn't hauled around a giant backpack with MBL (or your initials) on it? But by the time I had my braces taken off I had to accept the fact that oversized polo shirts and crisp khakis weren't going to earn me any street cred.

Melissa: Yes, even though I LOVE the high quality cotton fabric of a Women's Boat Tee as much as the next girl, for years I have held back the urge to have one delivered to my doorstep. 
L.L. Bean Signature Wool Blanket Coat, Plaid

Marcie: Well hold back no more! In my search for appropriate work clothes I have discovered that both Land's End and L.L. Bean are moving beyond unflattering front pleats and polar fleece. 


Melissa: Marcie it's true! L.L. Bean Signature holds on to that woodsy, conservative, classic style we have always loved, but now their designs are utterly wearable for young urbanites.

Women's Lightweight Slouch Chino's from Land's End Canvas
Marcie: And Land's End Canvas has an even more extensive collection of hip, high-quality weekend wear that I can rock in Philly. 

Melissa: I am a sucker for "investment pieces." When I buy something that's good quality I want to be able to wear it for years. I love this brushed lambswool cardigan in blue (below). It's the kind of sweater that you can wear season after season. 

Brushed Lambswool Cardigan from L.L. Bean Signature
 Marcie: The Land's End line seems to be more casual (not to mention less expensive), while the L.L. Bean line ranges from casual to dressy.Melissa, I'm so glad we got to have this little talk.I like embracing my inner WASP ;)

Melissa: And I'm so glad we get to recapture our childhoods and channel our inner prepster ;)


*Marcie and Melissa are major fans of these clothes and hope you find the humor in this "Stuff White People Like," inspired post. Remember to watch for Marcie and Melissa cruising the mean streets of Philly clad in their newly aquired, quality, casual New England weekend wear.*

Shawl Collar Cardigan from L.L. Bean Signature


Thursday, January 5, 2012

Tips From the Working Gal Who Forgot to Wear Pants!


Boyfriend's pants: good for work, obviously great for going out afterward  ;)  
Now, I am fully aware in neither of these pictures am I looking my best. Actually, quite the opposite! But I’m trying to make a point here, another public service announcement if you will: Looking your professional best at work whilst maintaining a carefree and fun-loving persona during your free time is tough. If you’re a “live life to the fullest” working gal or guy employed in a “professional” environment you may have some mishaps. You may perhaps forget to wear pants….
    Well, it’s not so much that I forgot to wear pants, as pack pants. Earlier this week I was excited to see my friend Malorie upon her return from Uganda, where she was employed by Invisible Children (a fantastic organization working to end the use of child soldiers in armed conflict and ultimately to help end civilian targeted warfare). My sister, boyfriend, and I met up with Malorie and our college friends Tory and Jeremy at the Victory Brew Pub. Now, this pub (with a great beer selection but sadly very wanting in its Gluten Free selection) is located about an hour from Philly, and this girl has to be up at six for work the next morning. This being the case, I packed a bag so I could stay downtown, and get more sleep.
      After a great time with Mal I dropped my sister off and retreated to Ben’s. I opened my backpack so as to hang my clothes for work the next day, and guess what I saw! Or to my absolute horror, guess what I didn’t see! Look at the photo above! It was PANTS! I neglected to bring pants.  A shirt I had, even tights were there. But pants? Nope. At one o’clock Tuesday morning I was faced with the grim visualization of me at work attired in nothing more than a maroon cowl-neck, black tights, and sensible shoes.This was not an option. My mind raced and I looked over at my slim and trim boyfriend. Idea time! Borrow Ben’s pants!

A nice little back shot. You too could look this good, but if this isn't your style read on for help!
I think given the circumstances I looked pretty darn OK. However, this situation is obviously not ideal. In order to help others avoid the fate of wearing men’s chino’s pulled up past their belly button, I have compiled a list of preventative measures for the young professional who just might forget to wear pants to work….

1.   (Suggested my mother, Patti) Leave a work appropriate outfit at work! Specifically, keep tights, a basic skirt that that works with most tops, a basic shirt, and a pair of pants! Do leave your favorite stuff at work because you’ll miss those if they’re out of rotation. Just leave something that fits and matches allot in your wardrobe! While you’re at it, leave a tooth brush and paste, too! This really is the ultimate solution, but I’d like to offer some additional backup options.
2.   Make friends with reliable and generous people at work who are of your same relative size. Even better, make friends with others who are your size and share your sense of style. Get their phone number. When sans pants, make use of this number.
3.   Find a significant other who is your same general size/build. Obviously same sex couples have the clothing sharing advantage here, but heteros can make it work, too. Just understand that the clothes probably won’t fit perfectly, but employ belts and a good sense of humor. Be thankful you’re not wearing tights. 

Wednesday, November 23, 2011

To loc, or not to loc.


Image from: i552.photobucket.com/.../hairmilk/locsbarbie.jpg
 
  Every 3 months I complete a ritual of hair doing. I’ve done this since I was 15 years old. Every 3 months I braid my hair in the same exact style; waist length braids with a part done the middle. I’m not complaining about the style, I love the style it’s my trade mark.I am complaining about the process of maintaining the style. 
   I wear extensions to create my length and it takes me at least 4 hours to take my braids out. I have naturally very tightly curled hair (AKA nappy), so it takes me an hour to wash my hair. It also takes me an hour to dry it and straighten it in preparation of re-braiding it.  I then have to braid my hair, that takes 8 hours or 2 chick flicks, 4 Sex And The City episodes, and 2 hour long shows most recently Mad Men (Don Draper is so dreamy). Thankfully I only do this every 3 months or I’d shave my head bald. Now that I have a toddler it is even harder. A 2 y/o and pampering yourself for 14 hours don’t mix.
   So I have been contemplating over a year now about locking my hair. I know there is maintenance but at least I don’t have to take my hair out anymore. It is permanent but I’m fine with that, I’ve had the same hairstyle since I was 15 and I’m 33. So my only hold up is the length. I don’t have waist length hair but I love the look on me. Ah, decision, decisions. What are you doing with your hair? 
 

*Kia 


Friday, November 11, 2011

Warning! This Wardrobe Malfunction could happen to YOU! Yes You!


     Last week I went to visit my brother, sister  in-law, and three fabulous nieces, and I had a spectacular time! But this post isn't about that (those posts will fallow :) This post an urgent Public Service Announcement: 


When wearing lace-up boots tie laces through all "eyelets"! I repeat, tie laces around all eyelets (or hooks)! 


    Heading to Ben's from the airport I failed to do so; I wanted to be all casual and cool. Big mistake! As I merrily stepped along in my MOMA boots (usually big bucks but purchased at Platos Closet for $35 dollars ;) and pulling my suitcase behind me, I reached Ben's charming little street and quickened my pace. And then, whoooooosh! Suddenly I was flying through the air. As I was hurling through space in a state of horror my mind cried out, "why?" as my mouth cried out, "AHHHHHHH!" Moments later my face and hands were crashing into the pavement and my Sigg bottle, suitcase, and glasses were strewn every which way. As I lay there dazed and confused and still wondering "why?" I happened to glance at my feet and received my answer: a shoelace loop from the carelessly tied laces on my left boot had become snagged in the empty shoelace eyelet of the carelessly tied right shoe. 
     Let my battered and bloodied chin and hands be a lesson to you all. Looking "cool" with carelessly tied boots is DANGEROUS! Those eyelet hoots at the top are there for a reason. Learn from my folly and use them! 

Thursday, November 3, 2011

Halloween Costumes: Not just what you know but who you know!

Charlotte and Ella, sailing the high seas of fashion! 
Sometimes for truly awesome Halloween costumes a mix and match of old, new, store bought, hand-me-down, and home-made is the best approach! As evidence of this, I turn to my friend, Jena, and her two little girls. This Halloween Jena went on a veritable treasure hunt to find just the right pieces so Charlotte and Ella could fly the skull and cross bones with pride. Here's Jena's map to pure Halloween gold! Many thanks to Jena and the girls! 
                         *Marcie 
Jena: 
Looking for the ocean! My sweet girls love to Reuse and Recycle, and that's why we love Halloween! There are so many ways to creatively use things you already have. The octopus is an amazing hand me down from a cousin, which I've been holding onto ever since Charlotte was a baby. And it was the perfect fit for Ella when Charlotte decided to forgo the princess route and become a tough pirate! Her pirate costume is a compilation of scraps that my Aunt and Grandmother had laying with the sewing. I also found an old jacket pattern from Easters past! With five dollars for the jacket fabric and one dollar for the hat at the dollar store, we say Jack Sparrow, eat your heart out!!!!


Tuesday, November 1, 2011

Halloween is a time to shine for moms with BA's in ART!

Charlie as Boba Fett and Lucy as an Elmo Princess, 2011


Kristen, Charlie, and Lucy 2010
Halloween is over, but I still want to showcase some of my favorite costumes from this year {I've tucked away a few for next years entries, too}. So, you don't need an art degree to create costumes like this, but it helps! Once you take a look at the adorable costumes made by my friend Kristen, I think you'll agree! Back in College Kristen and I took a wearable art class, where the human body became the "canvas" and fabric, the "paint." 


Charlie, as Thomas the Tank Engine, 2008
When I saw the quality and variety of the costumes Kristen made for her children, Charlie and Lucy, my mind went back to our times scouring the campus for unusual materials and bursts of inspiration {of course, back then our projects were more avant garde}. Take a look at these outfits, all, save for Batman, made by Kristen. Let them help inspire you for next year! Thank you, Kristen, and enjoy!


Charlie as the family dog,  Breezer, 2007
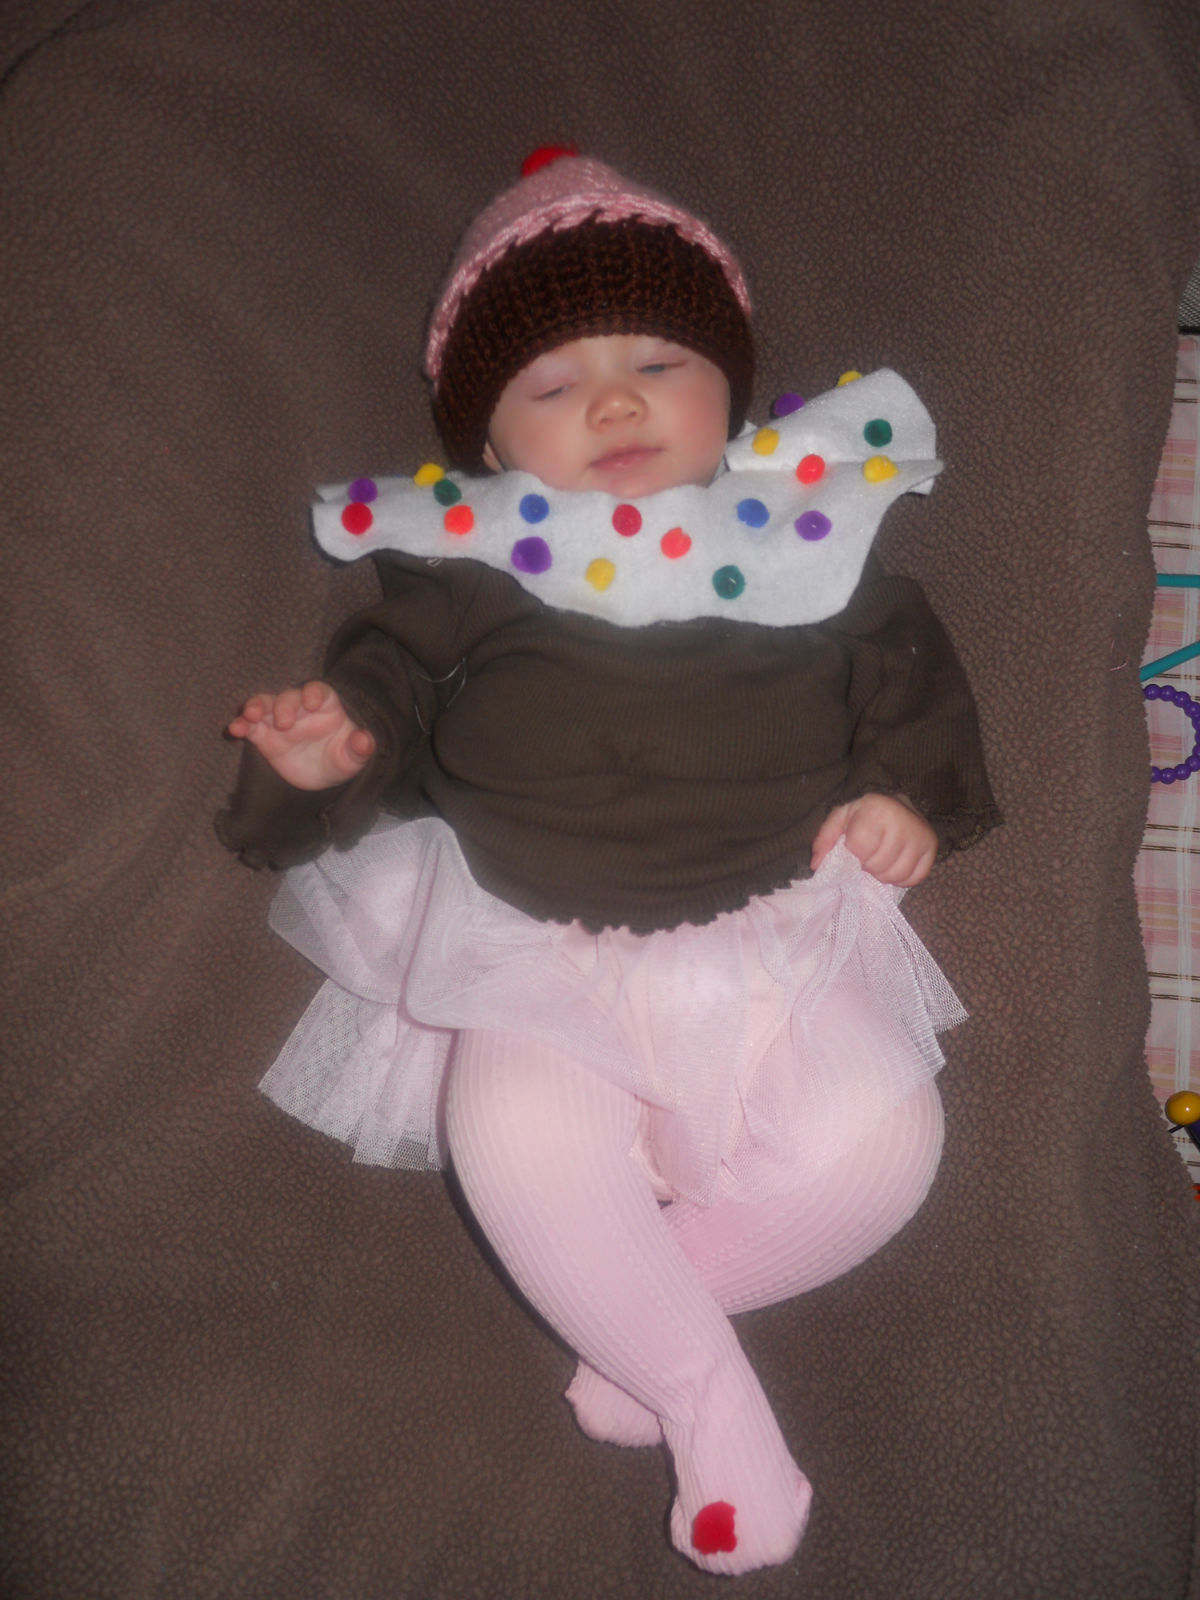
Lucy as a cupcake, 2010


                                                                                         *Marcie


Saturday, October 29, 2011

Second-Hand Costumes for Kids, Lookin' Anything But Shabby!

Winnie the Pooh, Tigger, and the Bee, too(!)  having fun at the "Pooh Tree" of Peace Valley Park 

As I’ve said, I’m very proud to have such a multitude of creative friends. For this post I give my thanks to one of my best high school girlfriends, Mary. She's allowed me to showcase her talent for saving the big bucks as she turns her kids into big bears {and bees, and tigers!}
       Mary is a true thrift store maven.  When her gang of little men decided they wanted to be characters from Winnie the Pooh this Halloween, she packed the kids in the car in search of great deals to make her guys fit for Hundred Acre Woods. Her oldest found an adorable Pooh costume, complete with a big ole honey belly, at the Salvation Army for a very agreeable $13. Her youngest also scored big with a bumblebee costume for $8 dollars. I like how Mary felt free to branch out from the original Pooh characters, but still found a costume that was related to the Pooh theme!
Her biggest Halloween score came from the Care and Share Thrift Shop in Souderton Pa. Now this particular thrift shop was an absolute favorite of my group of girlfriends, Mary, Bethany, Hannah, and my sister, Tegan.  With five shops in one complex, this thrift-store has tons of choices and excellent prices, and all the proceeds to help fund the very worthy projects of the Mennonite Central Committee!  For one dollar Mary’s middlest little man got himself a totally awesome tiger costume. Together, Mary's band of merry men make the cutest Pooh Bear, Tigger, and Honey Bee I’ve ever seen! 

              *Marcie 

Wednesday, October 26, 2011

Make Your Own {Ent} Mask!

I am lucky some extremely creative friends.  One day while perusing facebook I noticed Steve  Colon, a really great guy I went to college with, had constructed a really great mask for Halloween! Any Lord of the Rings fans out there? Well, you’ll be excited because this mask is of an  Ent {from Anglo-Saxon for "Giant"}, which is the name Tolkien gave for his tree people in the Lord of the Rings saga.
      Even if you’re not into Lord of the Rings, you’ll be into this mask because it’s just plain awesome! Steve very graciously provided me with instructions and pictures so anyone who’s interested can make their own. So if you’d like to break away from the pack this Halloween and impress party-goers or little trick-or-treaters, there’s still time for you to follow Steve’s lead and make an Ent mask of your own. This is also great if you’re involved in theatrical productions and want to create a fantasy mask. Thank you again, Steve!   
   
                         *Marcie


Instructions in Steve's words:


You will need: Corrugated cardboard, Gorilla glue, scissors, box cutters, a paint brush, pencils, an eraser, clothespins, masking tape, a 6" protractor, acrylic paints (red, blue, yellow, black, and white or you can buy more specific colors if you aren't confident in your mixing abilities), and a palate/something to mix paint on. Other helpful items you may want: Paper towels, a bowl of water (to clean the brush between colors and to help affix the gorilla glue), and something to put under your project like newspaper or parchment and a cutting board.

Step 1: Trace outside of the protractor with your pencil.
Step 2: Mark approximately every 10 degrees and draw a 1" line from the outside of the protractor.
Step 3: Connect the tips of these lines with your pencil.
Step 4: Invert the protractor, line up the ruler side with the bottom of your semi-circle. Trace the interior of the protractor.
Step 5: Draw a line from either side of larger semi-circle to the outside of the smaller semi-circle as pictured. Draw a 1" line from where this line touches the small semi-circle and connect it to the other outside lines as shown.
Step 6: Draw the eyes. You can make these as large or as small as you like, but remember to leave about .5" in the middle. Anything more and it will be very difficult to see out of. You can draw these free-hand or by using a cup to make perfect circles.


Step 7: Draw the nose. The center line should be about 2" long. From the bottom of this line, draw a 1" line going slightly upwards on either side. Draw converging lines on the outside of the nose, connecting all three lines. Erase the top .5" of the three lines. 
Step 8: Cut out the mask using scissors.
Step 9: Cut out the eyes and nose using the box cutter. You may want to shave off little bits around the nose to make it more comfortable to wear as I have done in this picture. Try it on and see what parts feel like they are pressing and carefully remove small slivers until it is comfortable. Remember not to remove the inner pieces of the nose entirely.
Step 10: Cut small, acute triangles from the lines on the top of the mask. Be careful not to cut too far into the forehead.
Step 11: Fold the flaps back.
Step 12: Tape the flaps together using the masking tape. This is what it should look like when you are done taping the flaps.
Step 13: Securely tape the nose into place. I suggest wearing the mask while applying tape to the outside of the mask to prevent making the nose too small. (Kind of like applying a breath rite strip.)Make sure to tape both the inside and outside of the nose, securing the tape by wrapping tape through the eye holes as pictured.

Step 14: Cut out a mustache. It can be as long or as short as you like. It shouldn't be too symmetrical. You can use either the scissors or the box cutter to do this.
Step 15: Cut out eyebrows. Again, don't make them too symmetrical.
Step 16: cut out the "crown". This part should look like random tree branches and should fit approximately to the forehead of the mask. You can make it out of one piece, or several layered pieces as I am doing here.
Step 17: Cut out the beard and the lower lip. You may want to line it up with the bottom of the mask to make sure it fits fairly well. See what I mean? Also, you can cut the square edges off the bottom of the mask if you like. This is purely an aesthetic choice on your part.
Here is what the mask looks like without paint.
Step 18: Mix your paints. If you are using primaries, mix red, yellow, and black to make whatever shade of brown you like. Make sure to make enough to cover the entire mask. Once you have the color you're looking for, add a little black to some and a little white to a different part to give yourself three separate shades of brown. You'll also want to mix two shades of grey, a dark green (blue and yellow with a bit of black), a light green (same as previous without the black) white, and black.
 Step 19: Paint the mask and the crown the "middle" shade of brown.
 Step 20: Paint the facial hair the dark shade of brown. Paint the lower lip the light shade of brown. using the dark and the light shades of brown, add shading and texture to the branches.
Generally I like to put the dark side on the lower parts of the branch and the light on top. You should also add speckles and spots to make it look something like bark.
Step 23: Using the dark and light green, add vines or moss to the branches.
Step 24: Repeat the process on the mask itself. You don't need to be as concerned with detail here as much of this will be covered over with other parts of the mask.
Step 25: Layer shades of brown, grey, green, as well as small bits of black onto the facial hair in a rough approximation of hair.
Step 26: Paint the lower lip like so, using light brown and grey. Outline it with white.

Step 27: Once the facial hair is dry, outline each piece with white paint.
Step 28: Apply Gorilla glue to each piece you want to attach to the mask and dampen the adjacent piece with water. Make sure to spread the glue in a thin layer over the part you want to stick. This allows for even adhesion and prevents over expansion of the glue. If the glue expands noticeably, you can always scrape off the foam while it is still fresh with relative ease.
Step 28 con't: Use clothespins to secure each piece until the glue expands and hardens.Repeat as necessary, applying the branches to each other, the eyebrows to the base of the crown.
Attaching the lower lip to the beard...The moustace just under the nose...
And Finally the beard to the crown and beard to the mask.
Give each connection an hour to dry, or half an hour if you are using fast setting gorilla glue (recommended.) At this point you can punch holes on the sides of the face, attach a rubber band and wear as you storm Isengard!


Wednesday, October 19, 2011

HaLLoOWeEN!!!! WhAt HavE YOu WOrn?!

Hillary{the watermelon}, Jessica {the fortune teller}, and Andrea and Kelly {the scarecrows}
  Well my friends, Halloween is closing in on us faster than the headless horseman upon the Sleepy Hallow Bridge {be warned, this is not the first cheesy or cliche reference in this post}. Fear not, at least aspect of this season of spooky merriment doesn't have to have you shaking in your boots ~ figuring out your costumes! This should be fun and easy breezy, people! Alas, like so many things in today's society Halloween costume choosing and execution can be extremely competitive, stressful, or even worse, just plain boring.
   But, it doesn't have to be that way! There are so many great options, from classic costumes to eccentric ensembles! Young and old can find great get-ups from thrift stores and vintage shops, from friends, and from your own imagination! The next few weeks Kia and I will be posting pics of awesome Halloween costumes from Halloweens past and present, and we're asking you to send in pictures of your best costumes! I'm proud to post the first submitted picture!
   This family is made-up of four exuberant and creative gals, Hillary, Jessica, Andrea, and Kelly {as pictured above}, and is headed by an awesome Ma and Pa. Ma, Diana, loves Halloween, and loved putting together costumes when her girls were little! "That was a banner Halloween year! The scarecrow outfits and the watermelon slice were homemade costumes that were given to me by friends. Jessica was a 'gypsy' or to be more PC, a 'fortune teller'...she was wearing my skirt, a blouse she had, I bought a length of lace fabric that was on clearance for her shawl, and a scarf for her head. The makeup was bought from McCrory's {a five and dime}. We never bought a costume, we always made our costumes or got costumes passed on to us. It was fun making costumes out of seemingly nothing!!!" So get inspired my friends, and show us what you got!

                        *Marcie 

Thursday, May 12, 2011

Fashion Confession


Pssst, I have a secret……
I just bought 2 Liz Lange Maternity dresses from Target .

Liz Lange maternity dress for  Target
 No, I’m not pregnant. I just like the way the dresses looked, so I bought them, and I love them. They look better than most non maternity sundresses and they were cheap, $22.00 a piece. If you just can’t bring yourself to venture into the maternity section if you’re not with child, here are a couple non maternity options: 1)Anthropologie,  2).Urban Outfitters


Liz Lange maternity dress for  Target


What’s your Fashion confession? I know you have one. Do you secretly like harem pants? Guys is your favorite pant cut pleats?  
                                   

                                                    *Kia*

Monday, May 9, 2011

Weekend Thrifting

Trevor's Thrift Store


I went to 2 thrift shops over the weekend; the 1st was near my old stomping grounds in the Overbrook section of Philadelphia,"What up Hill Top"(JK,I don't talk like that:)).I went to Trevor's thrift shop located at 6208 Lancaster Ave, Philadelphia, PA. I personally love a neighborhood thrift store because that’s where you find your real Jewels.I found a cute wrap dress for $5.Yes it's polyester but I can style it up to make it look like it cost $10.


Trevor's Thrift Store


I also was drooling over the colors in this dashiki. The blue was sooo vibrant,but it was too big. I could cut it down to fit but I'd loose too much of the fabulous pattern, so I decided not to get it, boohoo.


Salvation Army Thrift Store


The second store I went into was a the Good Will on 2601 S Front street,Philadelphia,PA 19148.I found a lovely Benetton Chambray blazer for $6 dollars, woohoo! 


Tuesday, May 3, 2011

Our Unexpected Adventures in Fabric Row


Wilbur Vintage & Designer Clothing
Marcie and I recently went down to Fabric Row, which is right below 4th and South, so I could get some material and a pattern to begin a skirt project (Note to self, don’t go to Fabric Row at 4:50pm on a Friday). When we got there the fabric stores were either closing or already closed. But, we noticed that there were a few shops still open and those shops were second hand stores. I love second hand shops but never knew there were so many on Fabric Row. One of the good things about the second hand shops is that there is a price point for everyone. We visited three shops on 4th Street and each shop was unique.

 
Rockers Closet

The first shop we visited was Rockers Closet, at 818 South 4th Street. Its price points reminded me of the thrift shops I went to as a child, which were wonderfully low. The shop is new so the inventory is still being built up, but there are good deals to be had. Interesting item of note: the proprietor runs an in-store alteration station. Also, I bought a-line knee length wool skirt for 4 dollars so I was happy.  :)
Decades Vintage


The next shop, Decades Vintange at 723 South 4th, would be a high-end vintage shop. It had designer vintage duds, glitzy baubles, and it was fantastically over the top. The proprietor told us of a shipment she recently obtained from a woman who lived down the street from Gianni Versace in the 80’s. The pieces weren’t Versace, but the clothes were definitely reminiscent of that time period- very luxe, very gold, very strong shoulders. It was maaarvelous, and there is lots to be had. But, you do really need to be patient and sort through to find items that are wearable now. 

Wilbur Vintage & Designer Clothing


The last shop we ventured in was WilburVintage/DesignerClothing,at 716 South 4th Street, and was a favorite of both Marcie and myself. It was the most well rounded shop, with a well edited selection, great prices, and a loungy, cool, relaxed atmosphere. The layout was thoughtfully spaced for easy browsing, which is especially important to me as a mom shopping with a young child. The prices were very reasonable, and I could get a lot of cool pieces at once without break the bank. The proprietor mentioned how he carefully inspects each piece before he adds it to the collection. And,I believe him because there was nada stain, or hole to be seen.      


Before I go, I wanted to give a little shout out to our CareWearShare roady, Maya B. She has been soooo patient. I’m sure she’d rather be practicing saying “NO” or putting lipstick on walls. We love ya girl. I also wanted to give myself a pat on the back for being a good friend;) The day we went thrifting was a beautiful day but it became very cold.  I risked being arrested by the fashion police, put on my husband’s 3X rhinestone encrusted orange Ed Hardy jacket, and  let Marcie wear my cute fitted black leather jacket. Having worn a very thin Members Only type jacket so Marcie was freezing her petunia off. My only saving grace was the fact the orange in the Ed Hardy jacket did work with my clothes. I risked it all because I really like Marcie; she’s one fab and fashionable gal.

*Kia*